Title: Taming the Timber: A Guide to Repairing Raised Floor Boards
Are you navigating the maze of your home, only to stumble upon an unsettling undulation beneath your feet? A raised floorboard can disrupt the harmony of your living space, transforming a once-inviting atmosphere into a constant reminder of repair needs. While this issue might seem daunting at first glance, fear not! With a blend of patience, a few basic tools, and a little know-how, you can restore your floor to its rightful flatness. In this article, we’ll walk you through the steps to fix a raised floorboard, ensuring your home remains not only beautiful but also a safe haven. Let’s dive in and reclaim the smoothness of your floors, one board at a time!
Table of Contents
- Identifying the Causes of Raised Floorboards
- Effective Techniques for Fixing Uneven Floorboards
- Choosing the Right Tools and Materials for Repair
- Preventing Future Issues with Floorboards
- Q&A
- To Conclude
Identifying the Causes of Raised Floorboards
Understanding what leads to raised floorboards is essential for effective remediation. Several factors can contribute to this issue, including:
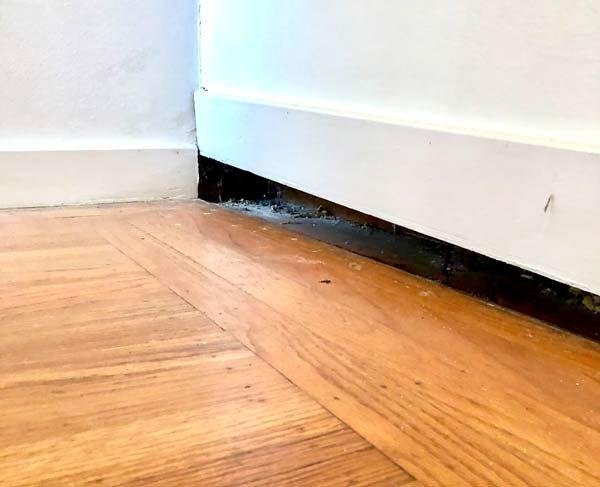
- Moisture Issues: Excessive humidity or water leaks can cause wood to swell, leading to uneven surfaces.
- Improper Installation: If boards aren’t laid correctly, they may buckle or warp over time.
- Temperature Changes: Fluctuating temperatures can cause wood to expand and contract, exacerbating the problem.
- Pest Infestation: Termites and other pests can compromise the structure of floorboards, creating gaps and raising sections.
Moreover, the age of your home and the materials used during construction can play a significant role. Here are some common causes based on age and material:
| Home Age | Common Materials | Potential Issue |
|---|---|---|
| New | Softwoods | Expansion due to settling |
| Older | Hardwoods | Dry rot or insect damage |
| Antique | Mixed materials | Inconsistencies in wood types |
Effective Techniques for Fixing Uneven Floorboards
To address raised floorboards effectively, start by identifying the root cause of the unevenness. Sometimes, moisture accumulation or settling of the house can lead to these issues. Assess the area where the floorboard is raised and determine if there are any underlying structural concerns. If the issue is minor, you might consider the following techniques:
- Shimming: Insert wooden shims under the raised area to level it with the surrounding boards.
- Adjustment of Fasteners: Tighten or replace loose nails or screws that may have become worn, allowing movement.
- Use of a Humidity Control System: In persistent cases of moisture, installing a dehumidifier can help alleviate issues caused by humidity.
If the problem persists or is more significant, you may need to resort to more involved repairs. Consider these additional solutions:
| Technique | Description |
|---|---|
| Subfloor Repair | Replace damaged sections of the subfloor that may be causing the floorboards to rise. |
| Floor Refinishing | Sanding down raised areas may help achieve a smoother finish. |
| Consultation | If unsure, hire a professional to inspect the structural integrity of your flooring. |
Choosing the Right Tools and Materials for Repair
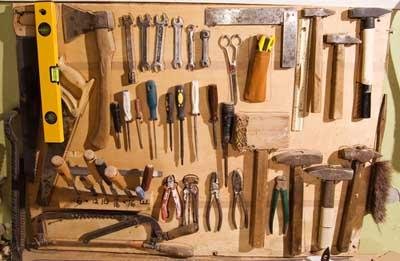
When tackling a raised floorboard, the selection of appropriate materials and tools is crucial for a successful repair. Begin by gathering essential tools, including:
- Crowbar or Pry Bar: To carefully lift the affected board without damaging adjacent ones.
- Saw: A hand saw or jigsaw may be needed if replacement is necessary.
- Hammer and Nails: For reattaching boards or fixing any loose parts.
- Screwdriver: Useful for tightening screws that may have become loose over time.
Next, choose the materials wisely to ensure a seamless repair. Consider the following options:
- Replacement Boards: Use wood that matches the existing flooring in size and finish.
- Shims: Essential for leveling and supporting the raised areas under the board.
- Wood Glue: Useful for securing boards together and preventing future movement.
Preventing Future Issues with Floorboards
To ensure the longevity of your floorboards and minimize the risk of future issues, consider implementing these preventative measures:
- Regular Inspections: Schedule periodic checks to identify early signs of damage or warping.
- Proper Humidity Control: Maintain indoor humidity levels between 30-50% to prevent wood expansion and contraction.
- Use Area Rugs: Place rugs in high-traffic zones to reduce wear and tear on your floorboards.
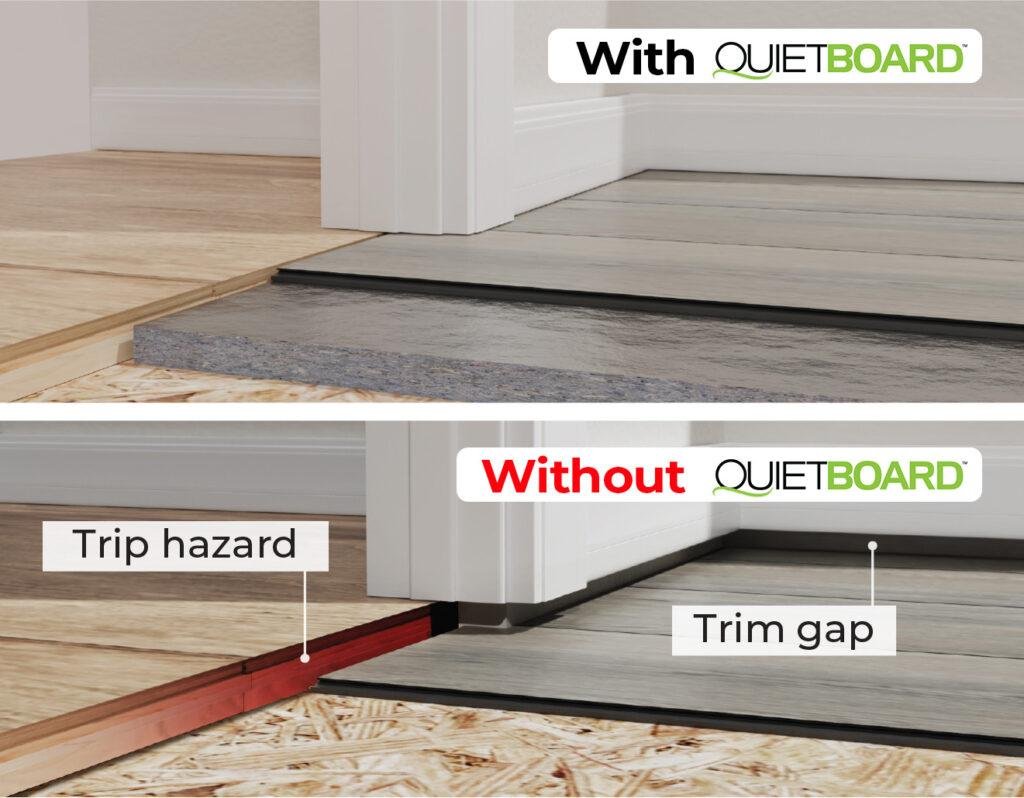
- Invest in Quality Underlayment: A quality underlayment can help absorb sound and temperature variations, reducing stress on floorboards.
- Prompt Repairs: Address any small issues like squeaks or loose boards immediately to prevent them from becoming larger problems.
Additionally, understanding the causes of floorboard issues can greatly help in avoiding them. Here’s a simple breakdown of common contributors:
| Issue | Preventative Measure |
|---|---|
| Excessive Moisture | Use dehumidifiers and ensure proper ventilation. |
| Extreme Temperature Changes | Maintain a consistent indoor climate. |
| Lack of Support | Install or reinforce floor joists as needed. |
| Pest Infestation | Regular pest inspections and treatments if necessary. |
Q&A
Q&A: How to Fix a Raised Floor Board
Q1: What causes a floor board to become raised?
A: A raised floor board can be the result of various factors, including moisture damage, settling of the house, or improper installation. Water leaks, fluctuations in humidity, or even heavy foot traffic over time can lead to warping or lifting of floor boards.
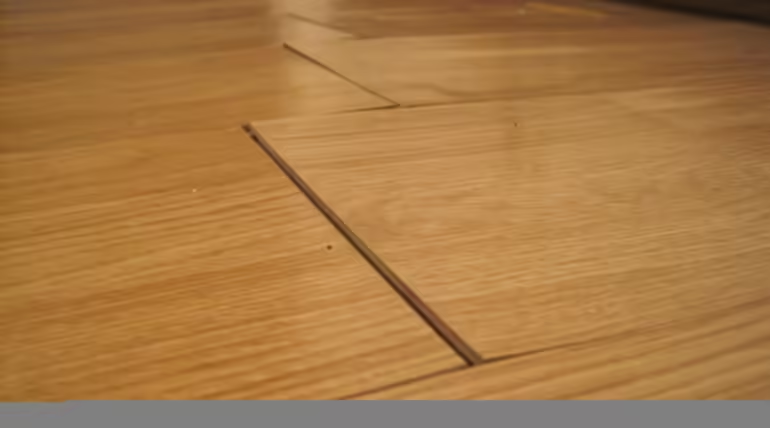
Q2: How can I identify a raised floor board?
A: To pinpoint a raised floor board, visually inspect the floor for any noticeable irregularities. You might also want to run your hand across the surface—if you feel any significant elevation or a bump in the floor that disrupts the otherwise flat surface, you’ve likely found the culprit.
Q3: What tools do I need to fix a raised floor board?
A: A basic toolkit will typically suffice. Gather a hammer, a pry bar, wood glue, clamps, sandpaper, a saw (if replacement is necessary), and a level to ensure the board is even after repairs.
Q4: Is it possible to fix a raised floor board on my own?
A: Yes, many homeowners can address minor issues with a raised floor board independently. However, if the problem is extensive or due to structural damage, consulting a professional might be your best bet.
Q5: Can I fix a raised floor board without replacing it?
A: Definitely! Depending on the severity of the raising, you can often fix it by re-securing or adjusting the board. Using a pry bar, gently lift the raised area and apply wood glue along the edges. Clamp it down until the adhesive sets, and sand any uneven surfaces afterward for a seamless look.
Q6: How can I prevent future raised boards?
A: Prevention is key! Ensure your home has proper ventilation and humidity control, regularly inspect for leaks, and follow installation guidelines strictly if you’re laying down new flooring. Additionally, a moisture barrier can be beneficial in areas prone to dampness.
Q7: When should I call in a professional?
A: If the raised floor board is accompanied by signs of significant underlying issues like water damage or if leveling does not resolve the problem, it’s time to consult a professional. They can provide a more thorough assessment and recommend appropriate solutions.
Q8: What if my floor boards are made of different materials?
A: Different materials may require specific approaches. For instance, hardwood can often be sanded down or adjusted, while laminate or vinyl might need replacing if the integrity is compromised. Understanding the material will guide you on the best approach to take.
Q9: After fixing a raised floor board, what’s the best way to ensure it remains secure?
A: Regular maintenance is essential! Check the area for moisture, ensure that furniture placement isn’t causing undue stress on specific boards, and be mindful of temperature fluctuations in your home, as these can lead to further movement in the flooring.
Q10: What’s the takeaway from this troubleshooting journey?
A: Fixing a raised floor board, while it may seem daunting, can often be managed with a little patience and the right approach. Regular inspections and maintaining your flooring can guard against future issues, helping to keep your space safe and sound for years to come.
To Conclude
addressing a raised floorboard can transform not only the aesthetics of your space but also ensure safety and comfort within your home. By following the steps outlined in this article, you can easily troubleshoot the root cause of the issue and take the necessary measures to restore the integrity of your flooring. Whether it’s a stubborn nail, moisture accumulation, or simple wear and tear, tackling these problems head-on can prevent further complications down the line. Remember, a well-maintained floor is the foundation of a welcoming environment. So roll up your sleeves and give your home the care it deserves—because every little detail counts in creating a harmonious living space. Embrace the satisfaction of DIY repair, and enjoy the solid, even footing of your revitalized floor.