Elevate Your Space: A Guide to Building a Raised Floor on Concrete
In the world of home improvement, the quest for a more functional and aesthetically pleasing living environment often leads us to explore innovative designs. One such transformation that has gained popularity is the installation of a raised floor over concrete. Whether you’re looking to enhance comfort, improve insulation, or simply create a more inviting atmosphere, a raised floor can be a game-changer. This guide will walk you through the step-by-step process of building a raised floor on a concrete surface, providing you with the knowledge and confidence to elevate your space. From choosing the right materials to understanding the structural considerations, you’ll learn everything you need to know to embark on this rewarding DIY project. Get ready to unlock the potential of your concrete floors and discover how a simple raise can lead to extraordinary results!
Table of Contents
- Understanding the Benefits and Basics of a Raised Floor System
- Essential Materials and Tools for Building a Raised Floor on Concrete
- Step-by-Step Guide to Constructing Your Raised Floor
- Finishing Touches and Maintenance Tips for a Durable Raised Floor
- Q&A
- Future Outlook
Understanding the Benefits and Basics of a Raised Floor System
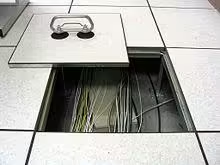
A raised floor system presents a myriad of advantages, particularly in commercial and industrial settings where flexibility and accessibility are paramount. By elevating the flooring, you create a space that allows for efficient routing of electrical and data cabling, which can dramatically streamline setups and modifications. This adaptability is further complemented by the ability to incorporate HVAC systems and plumbing under the floor, keeping the main working environment uncluttered and organized. Some of the key benefits include:
- Improved Airflow: Enhanced circulation beneath the floor increases efficiency in climate control.
- Easy Maintenance: Accessing and modifying utilities is straightforward, minimizing downtime.
- Design Flexibility: Aesthetic variations can be easily accommodated, making it ideal for open spaces.
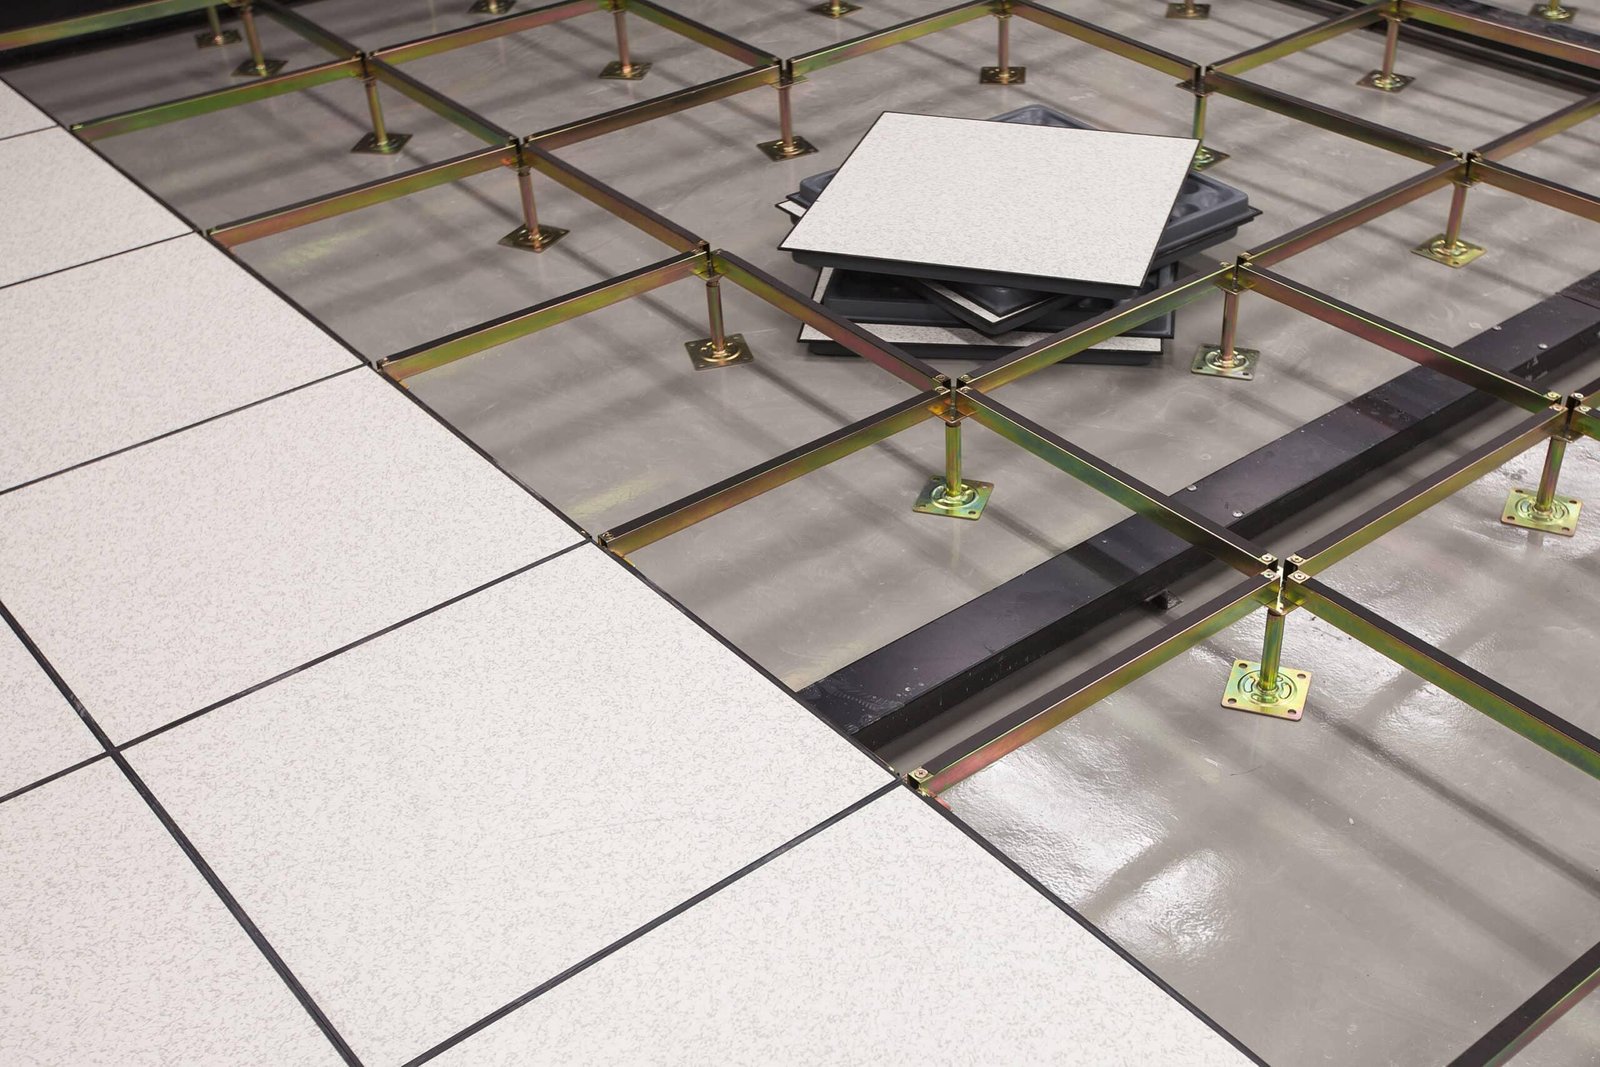
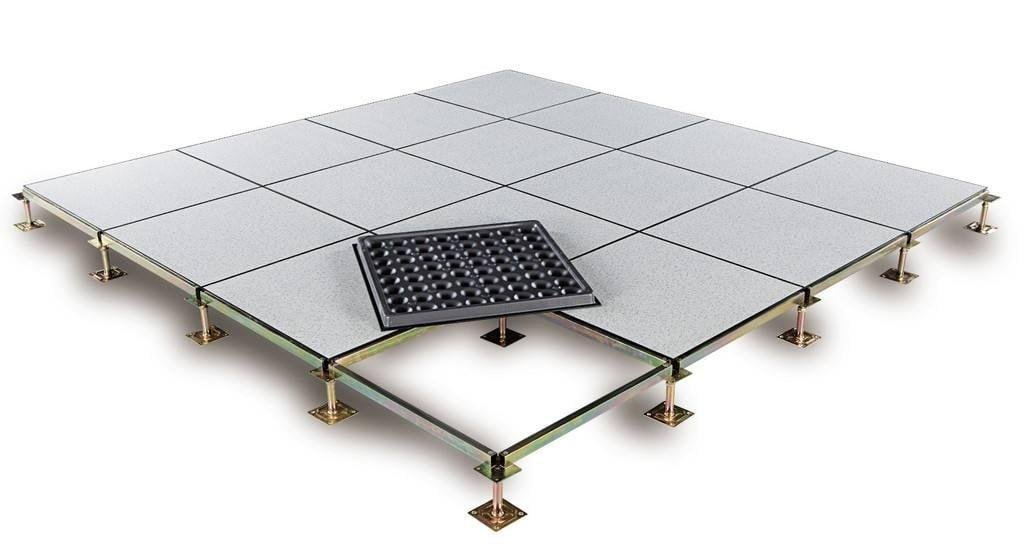
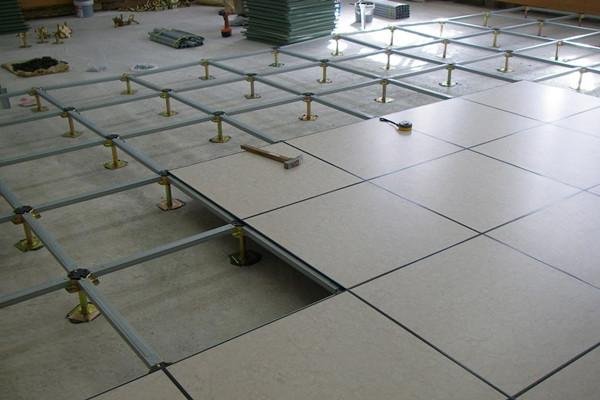
To successfully implement a raised floor system, understanding its core components is crucial. Typically, a raised floor is constructed using a grid of pedestals topped with panels that create the walking surface. These panels can be made from a variety of materials including steel, aluminum, and concrete, each offering different levels of durability and aesthetic appeal. Below is a simplified table illustrating the panel options and their features:
| Panel Material | Durability | Aesthetic Options |
|---|---|---|
| Steel | High | Textured, Powder Coated |
| Aluminum | Medium | Sleek Finish, Natural |
| Concrete | Very High | Varied Finishes, Painted |
Essential Materials and Tools for Building a Raised Floor on Concrete
When embarking on the journey of building a raised floor on concrete, having the right materials and tools is crucial for ensuring a successful and efficient project. Start by gathering the following essential materials:
- Plywood sheets – Choose a thickness suitable for your intended use, typically 3/4 inch works well.
- Pressure-treated lumber – Used for the frame, it resists moisture and prevents rot.
- Insulation – Foam boards or fiberglass insulation help with thermal regulation and soundproofing.
- Concrete fasteners – For securing your frame to the concrete floor.
- Vapor barrier – A plastic sheeting to protect against moisture from the foundation.
Equipped with the proper tools will streamline your workflow and ensure precision throughout the building process. Essential tools to consider include:
- Circular saw – For cutting plywood and lumber with ease.
- Drill/driver – Necessary for fastening screws and anchors.
- Tape measure – To plan and cut materials accurately.
- Level – Ensures your raised floor sits evenly.
- Square – For verifying right angles and ensuring the integrity of your frame.
Step-by-Step Guide to Constructing Your Raised Floor
To begin constructing your raised floor on concrete, the first step is establishing a solid frame. You’ll need to gather materials such as pressure-treated lumber for durability, as well as concrete screws and anchors to secure the frame effectively. Measure the designated area on the concrete slab and mark the corners using a chalk line for precision. Then, cut the lumber according to your measurements, ensuring each piece is level. Assemble the frame by using screws to join the pieces at the corners, creating a stable base that will support the flooring.
Next, it’s time to install the floor joists. These should be placed at regular intervals—typically every 16 inches—across the frame. Use joist hangers for added support and to prevent any sagging over time. Begin by attaching the joists to the frame, ensuring they are level and aligned. After securing the joists, install the plywood sheets across the joists to form the floor surface. You may also want to add insulation between the joists for added comfort. finish off your raised floor with appropriate flooring material, such as carpet, laminate, or tiles, depending on the desired aesthetic and use of the space.
Finishing Touches and Maintenance Tips for a Durable Raised Floor
To elevate the aesthetics and functionality of your raised floor, consider applying some finishing touches. Choosing the right flooring material is crucial; options like laminate or engineered wood can provide both durability and style. Additionally, ensure that the edges of the panels are properly sealed with flexible caulk to prevent moisture ingress, which can compromise the integrity of your floor. A final coat of polyurethane or sealant can create a protective barrier, enhancing the floor’s longevity and resistance to wear.
Routine maintenance is key to maintaining the beauty and durability of your raised floor. Regularly check for any signs of wear or damage, especially in high-traffic areas. Here are a few simple upkeep strategies:
- Sweep and vacuum frequently to remove dirt and debris.
- Mop with a pH-neutral cleaner to maintain the finish.
- Inspect and tighten any loose panels as needed.
Additionally, consider placing area rugs in high-traffic zones to protect the surface while adding a personal touch. By following these tips, your raised floor will not only look stunning but will also stand the test of time.
Q&A
Q&A: How to Build a Raised Floor on Concrete
Q: What is a raised floor, and why would I want one?
A: A raised floor is an elevated surface above your existing concrete slab. It provides several benefits: improved insulation, easier access to plumbing and electrical systems, enhanced aesthetics, and protection from moisture. It’s particularly useful in basements or areas where the concrete can get cold or damp.
Q: What materials do I need to start building my raised floor?
A: To create a raised floor, you’ll need some essential materials: treated wood or metal framing, plywood or oriented strand board (OSB) for the surface, leveling compounds for a smooth finish, and moisture barriers if you’re concerned about dampness. Don’t forget your tools—drills, saws, and measuring tapes are your best friends here!
Q: How do I prepare the concrete before starting my raised floor project?
A: Preparation is key! Start by cleaning the concrete surface thoroughly to remove any dust, debris, or moisture. Look for cracks and imperfections, and fill them using a concrete patching compound. If necessary, level the floor using a self-leveling compound to create a solid base for your raised floor.
Q: What is the process for installing the raised floor frame?
A: Begin by laying out your frame design. Using treated lumber or metal tracks, create a grid system that will support the floorboards. Attach the framing securely to the concrete using concrete screws or adhesive. Make sure your frames are level—use a spirit level to check before securing everything in place!
Q: How do I determine the height of my raised floor?
A: The height of your raised floor depends on its intended use. Generally, a height of 3 to 8 inches is common. If you need space for wiring or plumbing, or if you want better insulation, go taller! However, remember to consider door clearances and thresholds to avoid tripping hazards.
Q: Do I need a moisture barrier, and if so, how do I install it?
A: Yes, a moisture barrier is crucial, especially in basements or areas prone to dampness. Lay a polyethylene sheet over the concrete slab before framing your raised floor. This will help prevent moisture from seeping up into your flooring material, which could lead to mold or warping over time.
Q: What type of flooring can I use on top of the raised floor?
A: The world is your oyster! You can go for hardwood, laminate, tile, carpet, or even vinyl flooring. Consider the room’s function and your personal style. For example, carpet can add warmth to a chilly basement, while tile might be ideal for a more modern, sleek look.
Q: How do I prevent squeaking or movement in my raised floor?
A: To minimize noise and movement, use construction adhesive between the plywood and the framing. Additionally, ensure your screws are tight and that there are no gaps. Regular maintenance checks can help catch any issues before they turn into annoying squeaks!
Q: Are there any tips for finishing the edges of my raised floor?
A: Absolutely! To achieve a clean look, you can install quarter-round or baseboard molding along the edges where the raised floor meets the wall. This not only creates a polished appearance but also helps hide any imperfections. Plus, it adds an element of style to your space!
Q: Is building a raised floor a DIY project, or should I hire a professional?
A: This largely depends on your comfort level with tools and construction. If you have basic carpentry skills, this can be a rewarding DIY project. However, if you’re uncertain or if the space has unique challenges, hiring a professional might ensure the best results.
Q: Any final words of advice for someone starting this project?
A: Plan thoroughly! Take your time to measure accurately, choose the right materials, and consider all factors beforehand. With patience and attention to detail, you’ll create a beautiful raised floor that enhances both the functionality and aesthetic of your space! Happy building!
Future Outlook
As you embark on your journey to transform a concrete space into a comfortable haven through the construction of a raised floor, remember that each step you take contributes to both functionality and aesthetics. Whether you are aiming to create an inviting living area, a practical workspace, or simply enhance insulation and airflow, the process can be incredibly rewarding. By carefully planning, selecting the right materials, and executing each phase with diligence, you create not just a floor but a foundation for new possibilities.
As you look upon your finished project, take pride in the craftsmanship and the freedom it brings. The raised floor is more than just a structural element; it’s a flexible canvas for your creativity, allowing you to explore layouts and designs that suit your lifestyle. With a little time and effort, you’ve opened up a world of potential, inviting comfort and style into your environment. Now, with your new raised floor underfoot, let your imagination take flight—after all, the real magic of home improvement lies in the personal touch you bring to your space.