
Building a raised floor within four brick walls can transform a simple space into a functional and aesthetically pleasing environment. Whether you’re looking to create a cozy living area, an efficient workshop, or an inviting basement, the process of raising the floor not only enhances the utility of the room but also opens up new design possibilities. In this article, we will guide you through the essential steps to construct a raised floor, offering practical advice and insights along the way. From selecting the right materials to understanding the structural considerations, we’ll equip you with the knowledge you need to embark on this rewarding DIY project. Let’s roll up our sleeves and dive into the art of building a raised floor that complements your space perfectly!
Table of Contents
- Planning Your Space with Precision and Purpose
- Choosing the Right Materials for Stability and Aesthetics
- Step-by-Step Guide to Constructing Your Raised Floor
- Finishing Touches for Functionality and Style
- Q&A
- In Conclusion
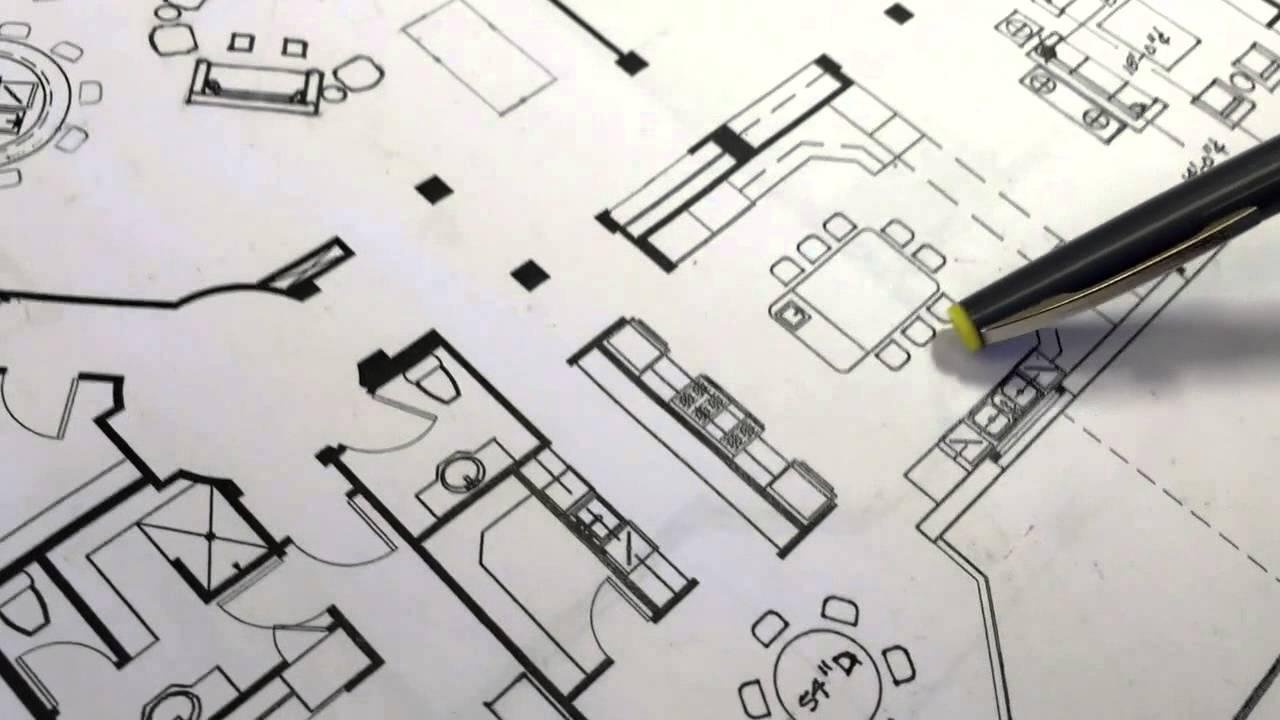
Planning Your Space with Precision and Purpose
Creating a raised floor within four brick walls can transform an underutilized space into a functional, versatile area. Start by assessing the space requirements and purpose of your raised floor. Consider factors such as height, materials, and insulation needs. To build effectively, follow these essential steps:
- Measure the area: Ensure accurate dimensions for the floor to maximize usability.
- Choose materials: Opt for durable materials like plywood or particleboard.
- Create a frame: Construct a sturdy support framework to hold the weight of the floor.
- Install insulation: Depending on your environment, consider adding insulation for temperature control.
After laying the groundwork, pinpoint any utilities that might need accommodation beneath the raised floor, like plumbing or electrical wiring. This preplanning will save you time and resources in the long run. Further, evaluate the floor finish to align with your overall aesthetic vision. A suitable surface could enhance both the functional and visual appeal. Here’s a quick overview of potential flooring options:
| Material | Benefits |
|---|---|
| Plywood | Affordable, versatile, easy to install. |
| Vinyl | Water-resistant, comes in various styles. |
| Laminate | Durable, replicates wood appearance, budget-friendly. |
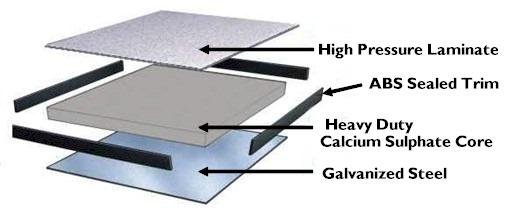
Choosing the Right Materials for Stability and Aesthetics
When embarking on the project of building a raised floor within your brick walls, selecting the appropriate materials is crucial for ensuring both stability and aesthetics. The foundation of your raised floor dictates not just its strength, but also how well it integrates into your existing space. Engineered wood, for instance, offers durability while providing a warm, inviting look. Alternatively, composite decking is an excellent choice for moisture resistance, giving you a stylish yet practical option. Here are some materials to consider:
- Engineered Wood: Offers a combination of strength and beauty.
- Composite Decking: Resistant to weather, ideal for humid areas.
- OSB or Plywood: Cost-effective choices that provide good support.
- Tile or Stone: For an elegant finish that is hard-wearing.
Alongside the functional materials, choosing the right finishing touches can greatly enhance your floor’s visual appeal while maintaining its integrity. Finishes such as varnishes, stains, or paint can protect against wear and damage while allowing for personalized aesthetics. Consider implementing insulation materials to minimize sound transmission and improve energy efficiency as well. Here’s a simple comparison of common finishing options:
| Finishing Option | Benefits |
|---|---|
| Varnish | Protects wood and enhances gloss |
| Stain | Adds color while preserving grain |
| Paint | Wide variety of colors with easy application |
| Sealant | Extra durability and moisture resistance |
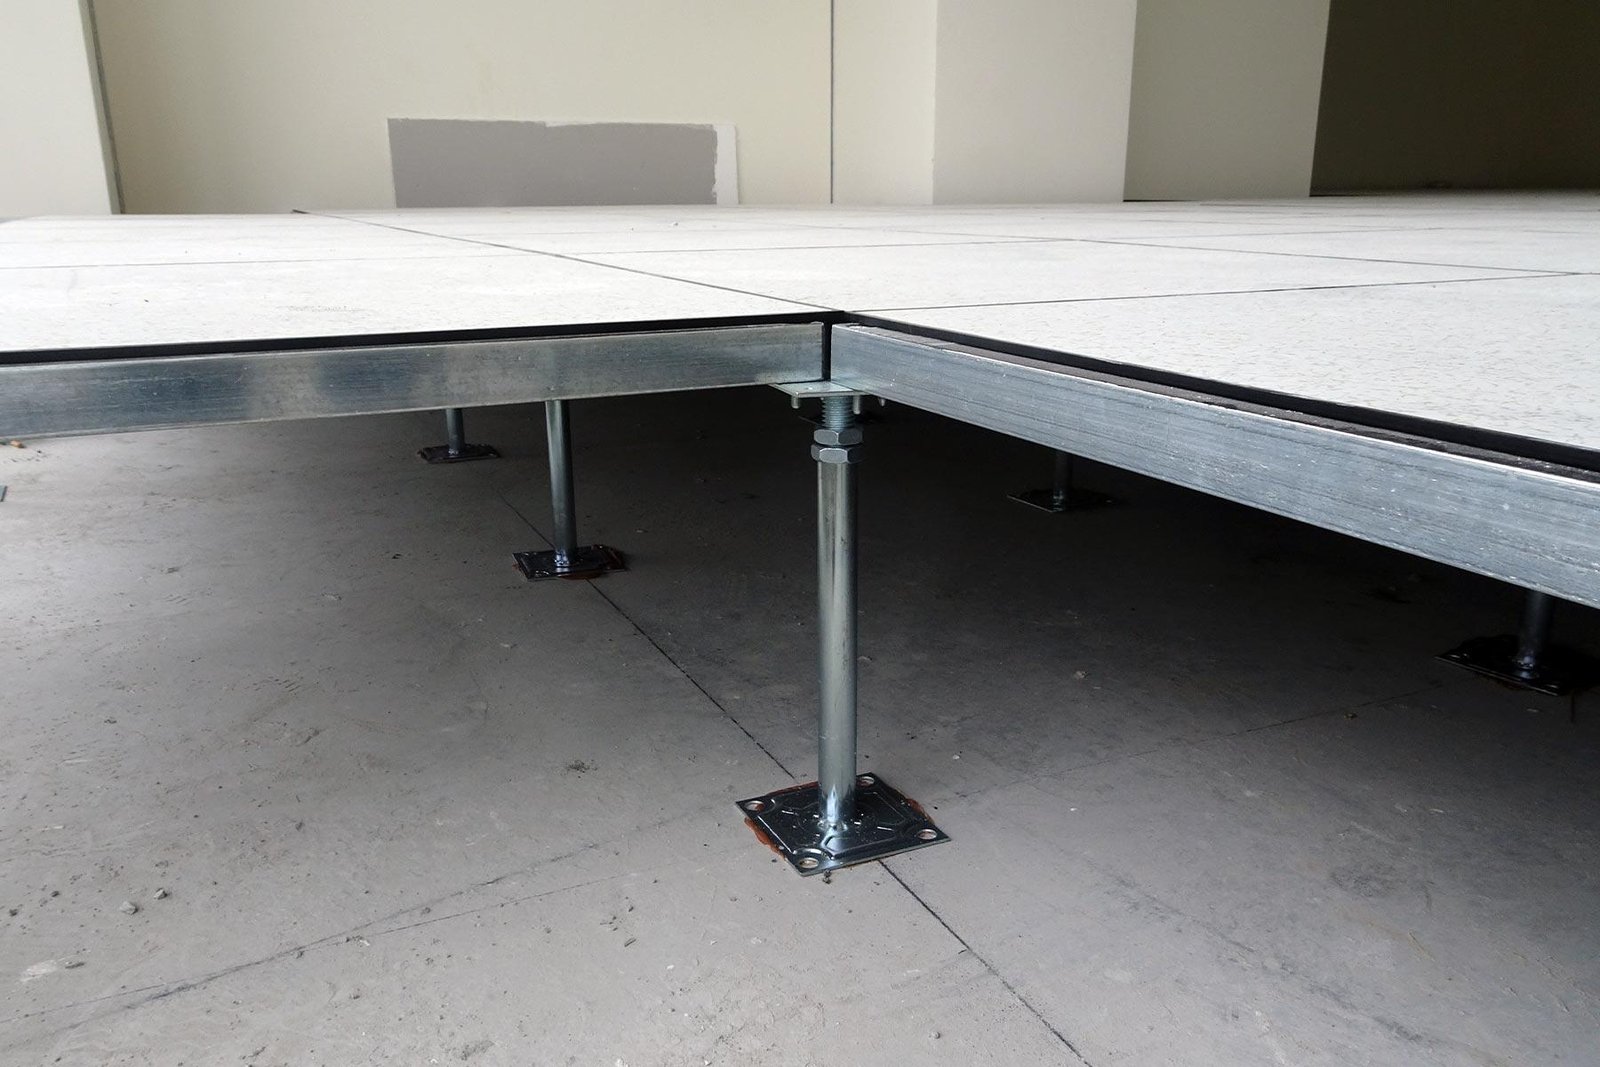
Step-by-Step Guide to Constructing Your Raised Floor
Creating a raised floor involves several methodical steps that ensure both functionality and aesthetics. Begin by gathering your materials. Key supplies include:
- Pressure-treated wood for the frame
- Subfloor panels (plywood is ideal)
- Insulation, if necessary for climate control
- Screws and brackets for stability
- Leveling tools for precision
Once your materials are ready, measure the area within your four brick walls accurately. Cut the framing wood according to your measurements, ensuring that your design allows for adequate support. Construct the perimeter frame, using brackets for added strength at the corners. Secure the frame to the wall using screws, making certain it remains level. Next, insert any insulation between the joists if your project calls for it. lay down the subfloor panels, fastening them securely to the frame. Ensure that everything is aligned properly to create a solid foundation for your raised floor.
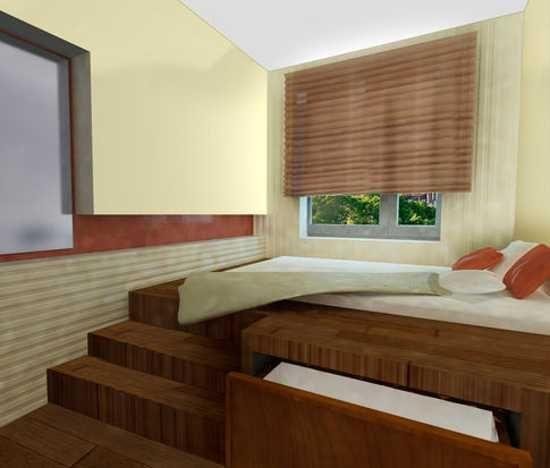
Finishing Touches for Functionality and Style
To elevate both functionality and style in your raised floor project, consider integrating a blend of materials and finishes that enhance the overall aesthetic while ensuring durability. Start by choosing from a range of flooring options that not only complement the interior design but also withstand daily wear and tear. Some popular choices include:
- Hardwood: Adds a touch of warmth and elegance.
- Laminate: Offers a budget-friendly alternative with a versatile appearance.
- Vinyl: Provides waterproof protection and easy maintenance.
Moreover, accessorizing the raised floor can significantly impact its visual appeal and utility. Think about installing built-in storage solutions or cables channels that help keep the area organized and free of clutter. Elegant trims and moldings can also be added to the edges of the raised floor for a polished finish. Here’s a simple overview of accessory ideas to consider:
| Accessory | Purpose |
|---|---|
| Storage Bins | Conceal clutter and maximize space. |
| Cable Management | Keep electronic cords organized. |
| Lighting Strips | Enhance ambiance and visibility. |
Q&A
Q&A: How to Build a Raised Floor Within 4 Brick Walls
Q1: What is a raised floor, and why would someone want to build one within brick walls?
A1: A raised floor, often referred to as an elevated or platform floor, is a flooring system built above the original ground level. It’s particularly beneficial for improving ventilation, managing plumbing or electrical systems, and creating a clean, dry space within a structure. Building one within four brick walls can enhance the aesthetic appeal, create additional storage space, and help mitigate issues like moisture.
Q2: What materials do I need to build a raised floor?
A2: To create a raised floor, you’ll need the following materials:
- Wooden beams (typically 2×6 or 2×8)
- Plywood sheets (for the surface)
- Support blocks or joist hangers (for stability)
- Leveling compound (optional, for uneven surfaces)
- Screws and nails for fastening
- Insulation material (if extra thermal protection is required)
Q3: What tools are essential for this project?
A3: You’ll need:
- Measuring tape
- Circular saw or handsaw
- Level
- Screwdriver or drill
- Hammer
- Safety gear (gloves, goggles)
Q4: What is the first step in building a raised floor?
A4: The journey begins with careful planning and measuring. Assess the space within the four brick walls, taking note of the dimensions and ensuring you have a clear layout for your raised floor. Sketch your plan and determine where the beams will run for optimal support.
Q5: How do I prepare the space before construction?
A5: Clear out the area to have a clean workspace. Remove any debris, dust, or obstructions that may interfere with the floor’s construction. If necessary, ensure the brick walls are sound and stable to support the raised floor.
Q6: How do I lay down the support beams?
A6: Begin by marking the locations for your support beams on the walls, ideally spaced 16 to 24 inches apart. Use a level to ensure they’re even, then attach the beams securely to the walls using brackets or anchors. Make sure they’re straight and properly aligned for maximum stability.
Q7: What steps do I follow to install the plywood?
A7: Once the support beams are in place, cut your plywood sheets to fit the designated area. Lay them across the beams, ensuring they fit snugly and securely. Use screws to fasten the plywood down, driving them at regular intervals to prevent any movement.
Q8: How do I ensure the raised floor is level?
A8: After laying the plywood, check for any unevenness using a level. If you notice any dips or high points, use shims or leveling compound to create a flat surface. This step is essential for both aesthetic and structural reasons.
Q9: Should I add insulation under the floor?
A9: Depending on the climate and intended use of the space, adding insulation can be beneficial. Placing insulation between the beams can help regulate temperature, keeping the area warmer in winter and cooler in summer while enhancing energy efficiency.
Q10: Are there any finishing touches I should consider?
A10: Absolutely! After the floor is installed, consider adding a layer of flooring material, such as laminate, carpet, or tile, to match your decor. You may also want to consider skirting or trim around the edges for a polished look. check to ensure everything is secure and stable before putting the space to use.
Q11: Can this project be done by a novice DIY enthusiast?
A11: Yes, building a raised floor can be tackled by a beginner with some basic carpentry skills. However, it’s important to approach the project with patience and follow safety guidelines. Don’t hesitate to seek advice from experienced hands if needed!
Q12: What are the common pitfalls to avoid during the building process?
A12: Common pitfalls include:
- Skipping the planning stage, which may lead to measurement errors.
- Not securing the beams correctly, compromising stability.
- Failing to check for levelness, resulting in an uneven floor.
Learn from these pitfalls by taking your time and double-checking your work!
This Q&A serves as a guide to help you embark on the rewarding journey of building a raised floor within brick walls, creating a functional and appealing space for your needs. Happy building!
In Conclusion
constructing a raised floor within four brick walls is an endeavor that marries creativity with practical skills. By meticulously planning your design, selecting the right materials, and following each step with care, you can transform a simple space into a functional oasis. Whether you’re seeking to improve insulation, enhance aesthetics, or create additional storage, your raised floor can serve multiple purposes while providing a unique character to your environment. As you embark on this project, remember that patience and attention to detail will be your greatest allies. Embrace the journey, and soon enough, you’ll be standing atop your very own handiwork—an accomplishment that not only elevates your space but also enriches your crafting spirit. Happy building!